From 4TB to 12TB Capacity: The ZFS 'Heart Transplant' that Tripled My Storage
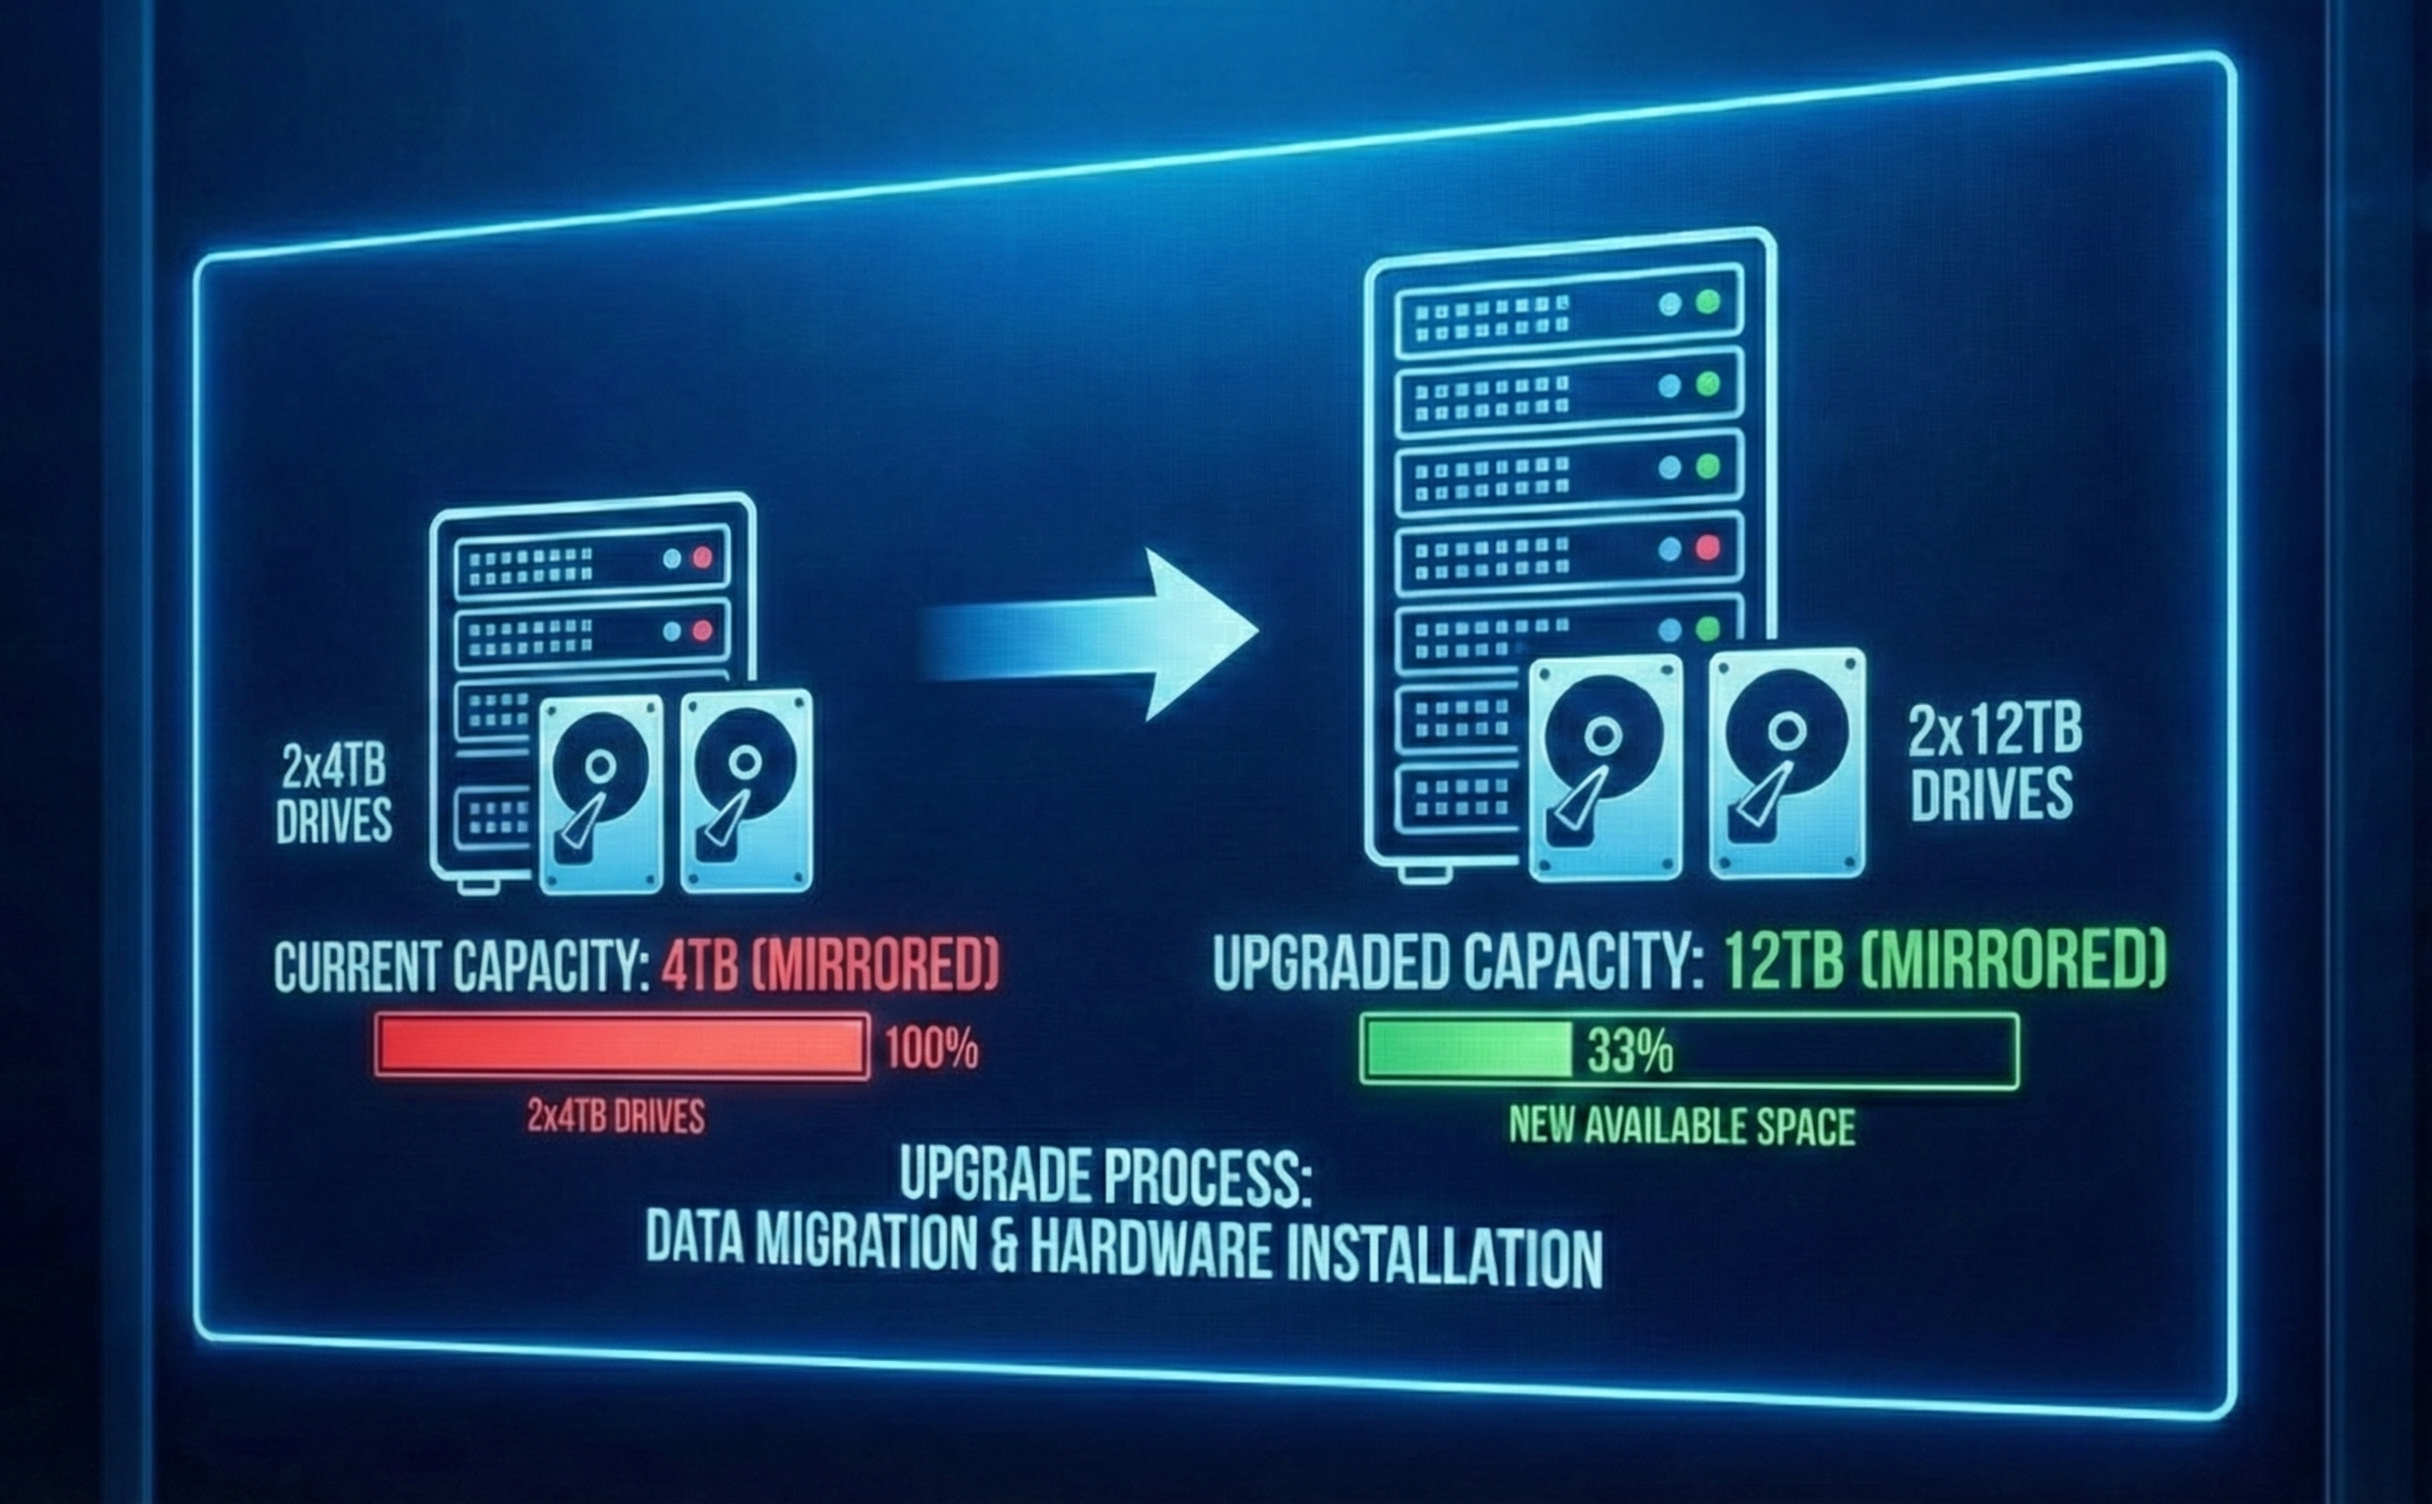
I finally hit the wall. My trusty 4TB ZFS mirror—which felt infinite when I first built my NAS—was hovering at 85% capacity. In the world of ZFS, that’s the "danger zone" where performance starts to degrade and fragmentation becomes a headache.
I had two choices: buy a new chassis to add more drives, or swap my existing drives for larger ones. I chose the latter. Here is why I swapped my 4TB mirrored pool for 2x12TB HDDs, and exactly how I managed the process in TrueNAS Scale.
The "Why": Density Over Sprawl
Why replace perfectly good drives?
- Port Conservation: My NAS case ( HP EliteDesk G4 SFF) has limited drive bays. Adding another pair of drives (another VDEV) wasn't physically possible without a chassis upgrade.
- Power Efficiency: Spinning two 12TB drives consumes roughly the same power as spinning two 4TB drives, but gives me 3x the storage.
- Simplicity: ZFS handles disk replacements beautifully. You don't need to migrate data or rebuild the pool from scratch. You just swap the tire while the car is still moving.
The Strategy: The "Replace and Resilver" Shuffle
You cannot just rip out both 4TB drives and plug in the 12TB ones; you would lose your pool. The process relies on ZFS redundancy. Since my data is mirrored (RAID 1 equivalent), I could remove one drive, and the pool would survive on the remaining one.
The plan was simple:
- Take Drive A offline.
- Replace Drive A with the new 12TB HDD.
- Let ZFS "resilver" (copy data) from the old Drive B to the new Drive A.
- Repeat the process for Drive B.
The Process: Step-by-Step in TrueNAS Scale
Step 1: The Safety Net (Backup)
Before touching any hardware, I verified my backups. While ZFS is robust, pulling a drive technically degrades your pool to a state with zero redundancy until the new drive is resilvered. If the remaining old drive failed during the process, my data would be toast. I made sure my critical data was backed up off-site.
Step 2: Offline the First Drive
In the TrueNAS Scale interface, I navigated to Storage and clicked Manage Devices on my main pool.
I located the first 4TB drive (sdX), clicked the three dots next to it, and selected Offline.
Note: You technically can just pull the drive if you have hot-swap bays, but offlining it first is the "polite" way to tell the OS to stop writing to it.
Step 3: The Physical Swap
With the drive offline, I shut down the server (my case isn't hot-swappable) and physically swapped the old 4TB drive for the new 12TB monster. When I booted back up, TrueNAS showed the pool state as "DEGRADED"—completely normal, as it was missing a disk.
Step 4: The Logical Replacement
Back in Storage > Manage Devices, I clicked the disconnected drive placeholder and selected Replace.
TrueNAS asked me to select the new member disk. I chose the new 12TB unformatted drive from the dropdown.
Crucial Step: I double-checked I was selecting the correct new disk to avoid wiping the wrong thing.
Step 5: The Long Wait (Resilvering)
Once I clicked "Replace," the resilvering began.
Resilvering is ZFS reconstructing the data on the new drive. Because I only had about 3TB of data, this took 6 hours. I monitored the progress using the dashboard, which showed the scan speed and estimated time remaining.
Step 6: Rinse and Repeat
Once the status returned to "ONLINE" and healthy, I repeated Steps 2–5 for the second 4TB drive.
- Offline the remaining 4TB drive.
- Swap in the second 12TB drive.
- Click Replace in the UI.
- Wait for the second resilver to complete.
Step 7: The Expansion
This is the magic moment. After the second drive finished resilvering, my pool was healthy, but it still reported only 4TB of total size.
This is because ZFS doesn't automatically claim the new free space unless autoexpand is enabled.
I went to the Pool Options (the gear icon on the Storage dashboard) and hit Expand Pool (sometimes listed specifically under VDEV options depending on your Scale version).
Instantly, my capacity jumped from 4TB to ~12TB.
The Result
I now have a 12TB mirrored pool with the same physical footprint as before. The process was terrifyingly simple, a testament to why I run TrueNAS in the first place. The resilvering put some stress on the drives, but now I have enough headroom to hoard data for another few years—or until 20TB drives go on sale.
I’ll admit, staring at that 'DEGRADED' status bar during the resilver gave me a few grey hairs. There is always that tiny fear that the second drive will choose that exact moment to fail. Have you ever had a drive die in the middle of a rebuild? Share your NAS horror stories in the comments so I can sleep better knowing I’m not alone!